Chapter 3 Prerequisite 準備工作
本章介紹的準備工作, 以不同的開發板區分成幾段:
- §3.1, §3.2 及 §3.3 是準備給 STM32 DISCO F746NG (或其它 STM 及使用 ARM MCU 系列) demo board
- 如果是 Arduino Nano 33 BLE Sense, 則直接到 §3.4 準備 Arduino IDE, 相對而言, 簡單許多. (2021/4/5 新增: 用 Makefile 來產生 Arduino 的 examples 程式)
- §3.6 說明 ESP32 的 Arduino 開發環境安裝
- §3.7 說明 ESP32 的 idf 開發環境安裝
3.1 git 及 github 簡單操作
$ git clone https://github.com/marconi1964/tensorflow.git
$ cd tensorflow
$ git pull                 # 每次修改前, 下載 github 最新的內容
# 新增/修改檔案後
$ git add *
$ git commit -m “修改內容的註釋”
$ git push origin master    # 新的 github 已經改成 main
# 或是簡單點
# git push# 有時候, 忘了 git pull 就修改 local 檔案時, 跟 github remote 上的檔案有衝突時該怎麼辦?
# 不麻煩, git stash 可以解決這個問題
$ git stash # 將修改過的內容暫存起來
$ git pull
$ git pop # 或 git apply, 差別在於 git pop 後, 暫存內容就消失, 而 git apply 的暫存內容依舊存在
# 這時候, 會列出內容有衝突的檔案名稱, 可以直接修改該檔案(同時列出有衝突的內容)
# 修改後, 記得 push 去 更新 remote 內容
$ git push # 更新到 github remote 內容
$ git stash drop # 暫存內容已無必要, 可以扔了3.2 認識 make 及簡單操作 (mbed cli 的操作必備技能之一)
見參考文件 跟 Seisman 一起写Makefile
3.3 在 Windows 10 下安裝 VMware Workstation Player 及 Ubuntu 18.04
本篇文章(原先我撰寫載於github/tensorflow/lite/micro/examples/README.md)說明如何在 Windows 10 上安裝虛擬機器, 執行 Linux - Ubuntu 系統, 以便編譯 TensorFlow Lite Micro 在 STM32 DISCOVERY_F476NG 板子上執行的測試程式
3.3.1 0. 事先準備
- 0.1 需要一個 email 位址作為網站下載軟體之註冊用,
- 0.2 需要在 github.com 上面開個帳號, 對以後的軟體開發會有幫助
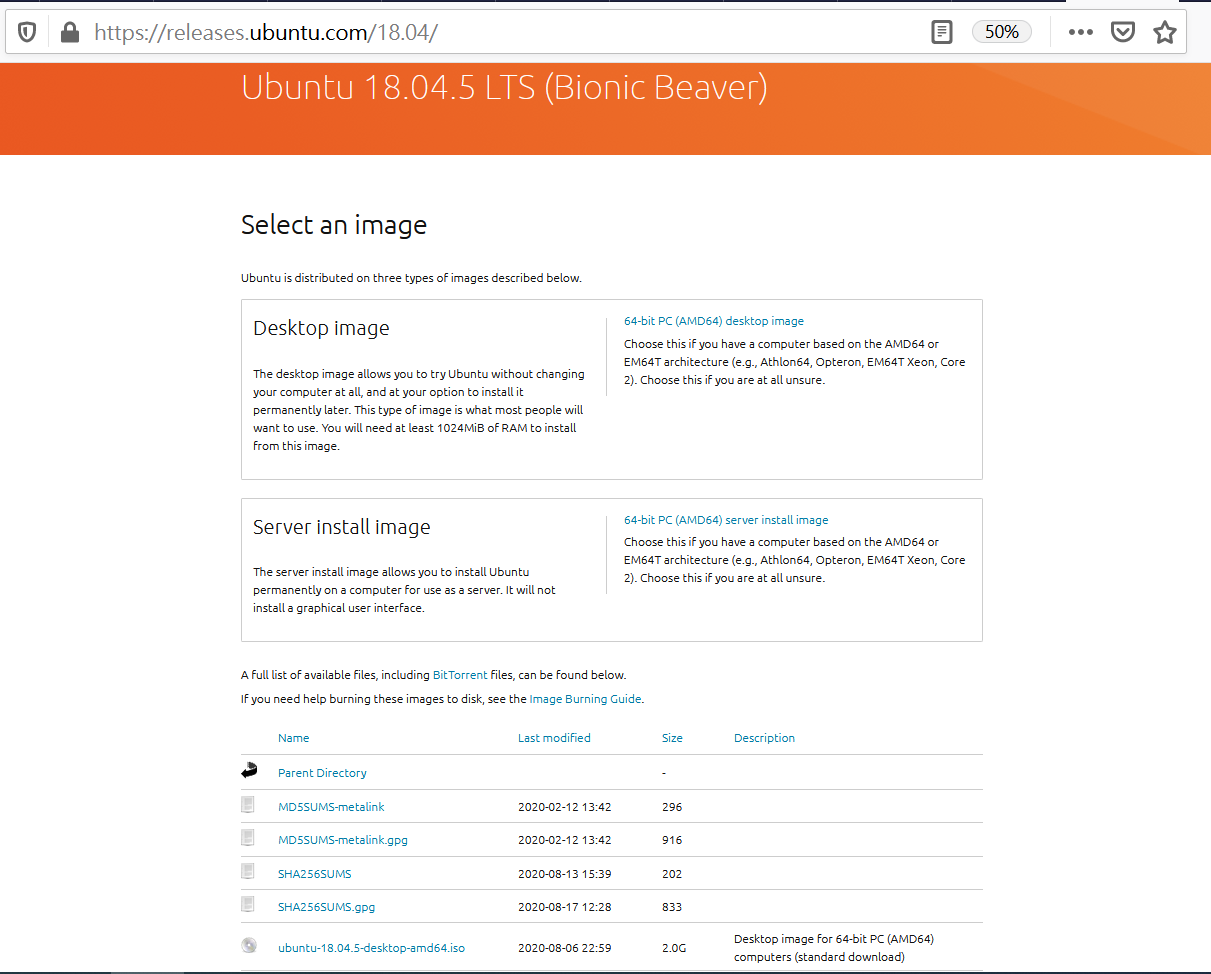
3.3.2 1. 下載 Ubuntu 18.04 ISO image 檔案 (電腦需要至少 20GB 以上硬碟空間, 預估下載時間: 7 分鐘)
- https://releases.ubuntu.com/18.04/
- 選擇 ubuntu-18.04.5-desktop-amd64.iso 下載, 記住儲存目錄
3.3.3 2. 下載及安裝 VMWare Workstation Player (預估下載時間: < 1 分鐘 / 操作時間:10 分鐘)
- 2.1 下載 VMWare Workstation Player 安裝程式檔案 https://www.vmware.com/products/workstation-player/workstation-player-evaluation.html
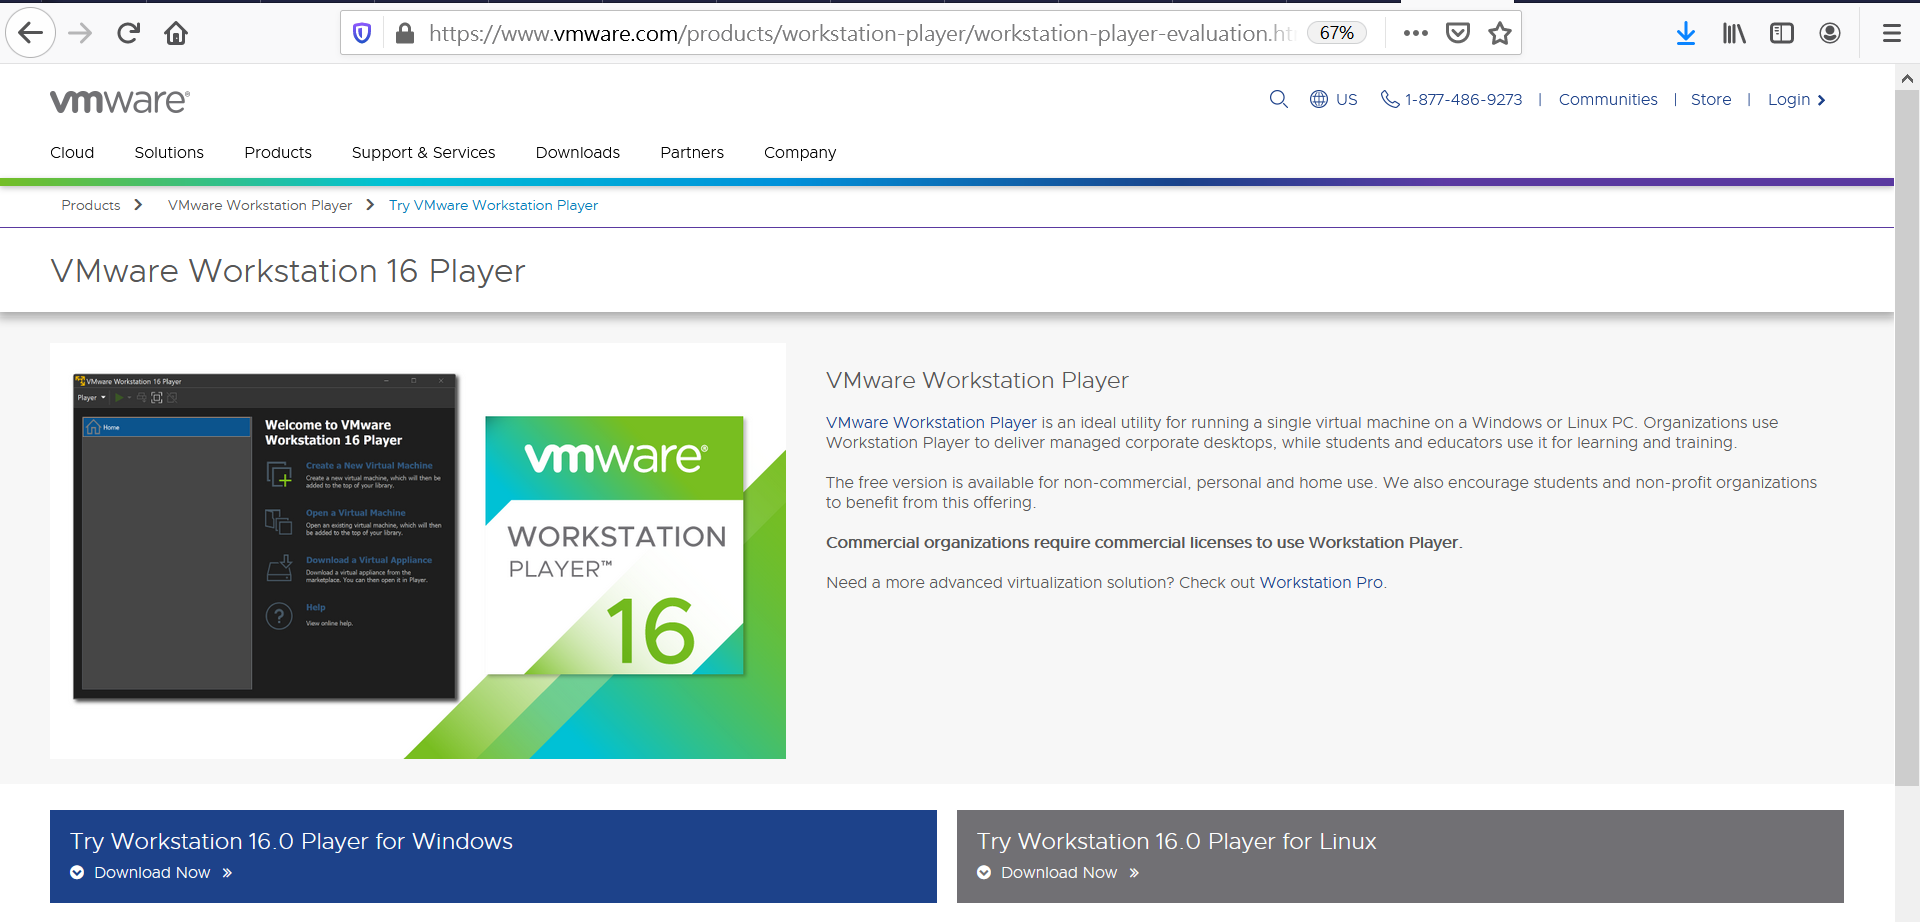
- 2.2 執行 VMWare Workstation Player 安裝程式
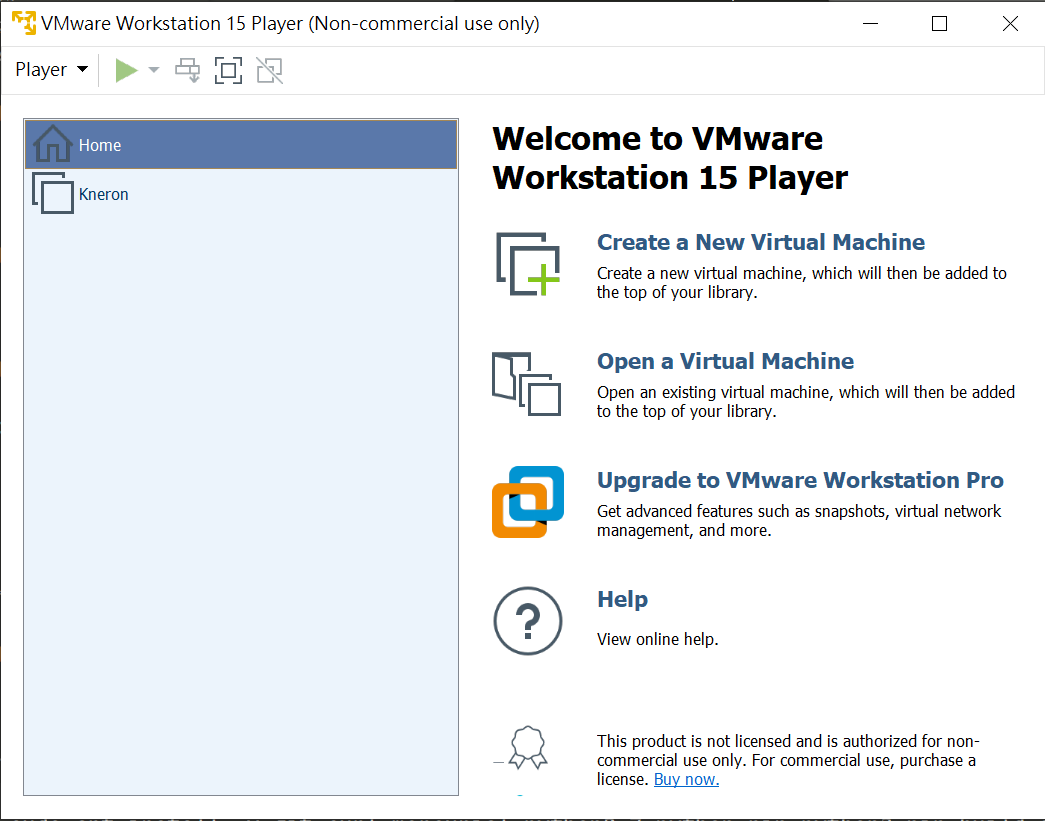
- 安裝完成後, 執行 VMware Workstation Player
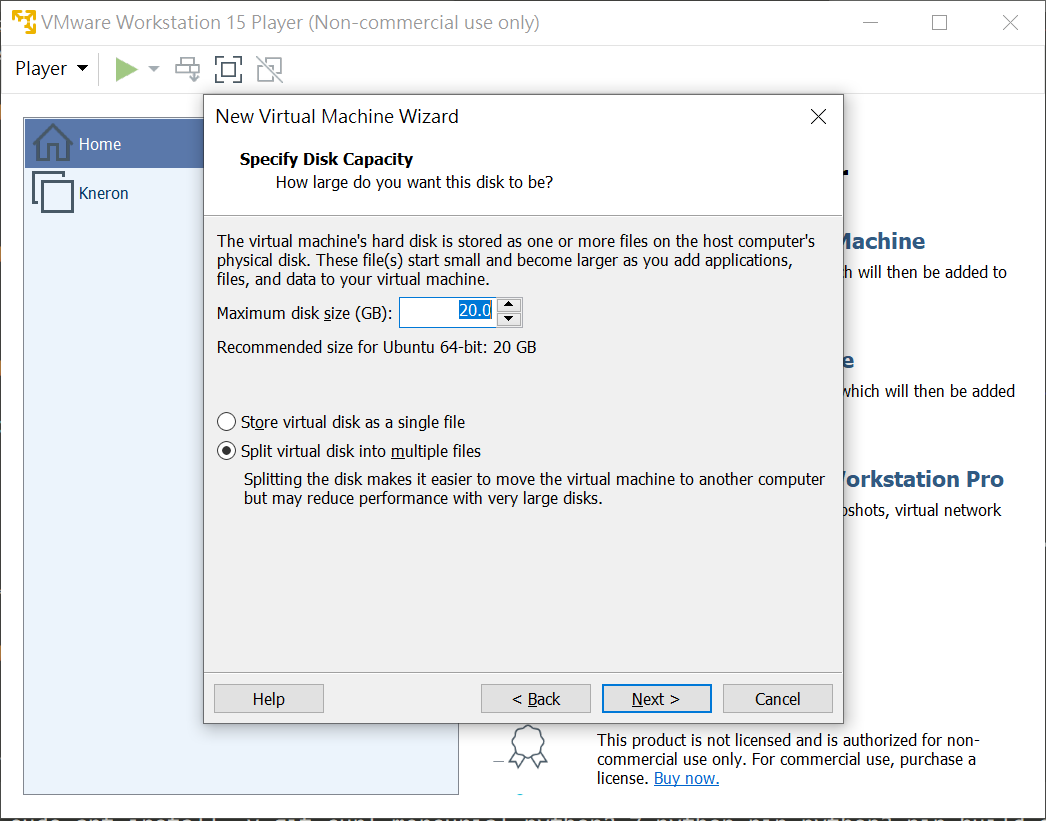
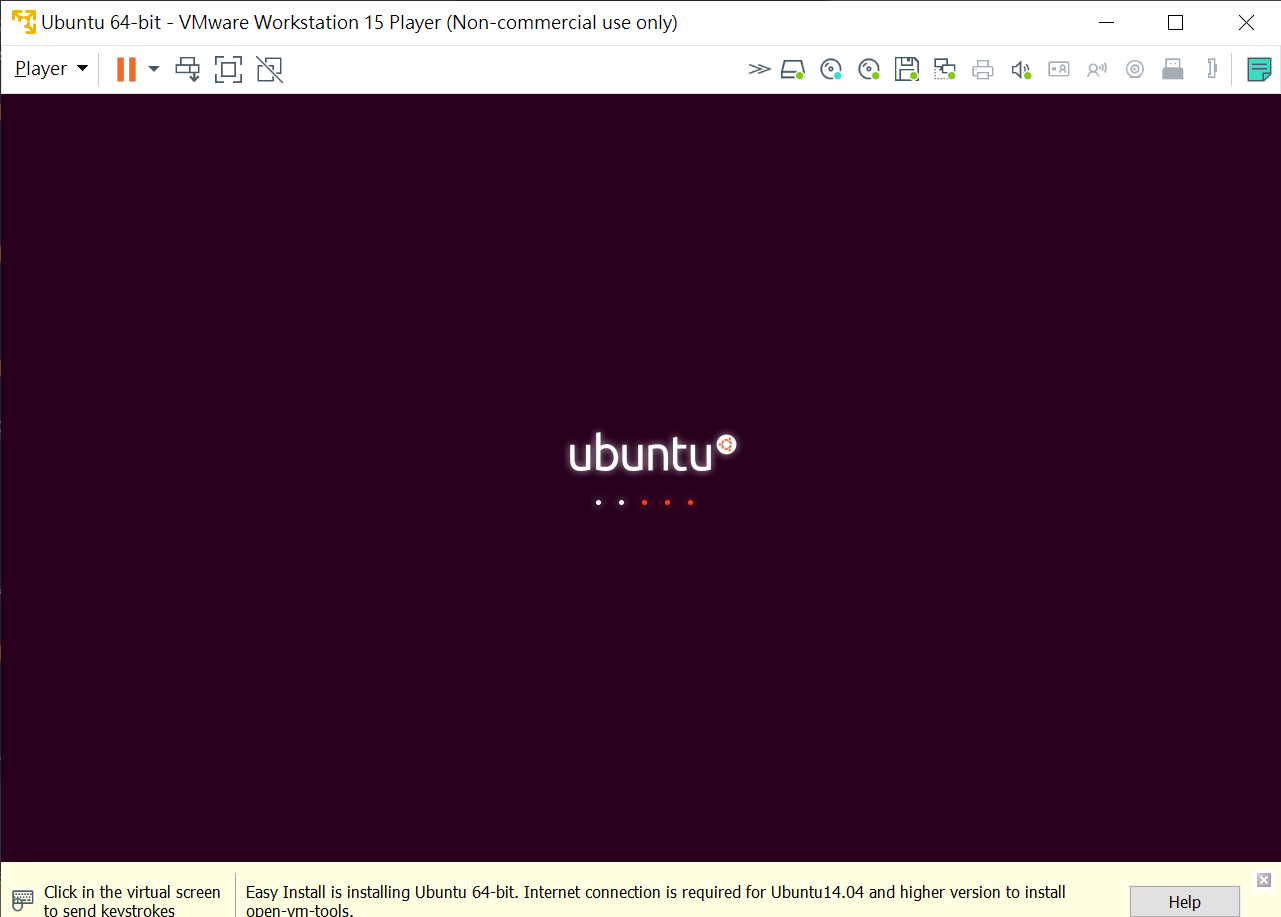
- 2.3 Create a new virtual machine. 點選 ‘Installer disc image file (iso),’ 到儲存 ubuntu-18.04.5-desktop-amd64.iso 的目錄後, 開始安裝


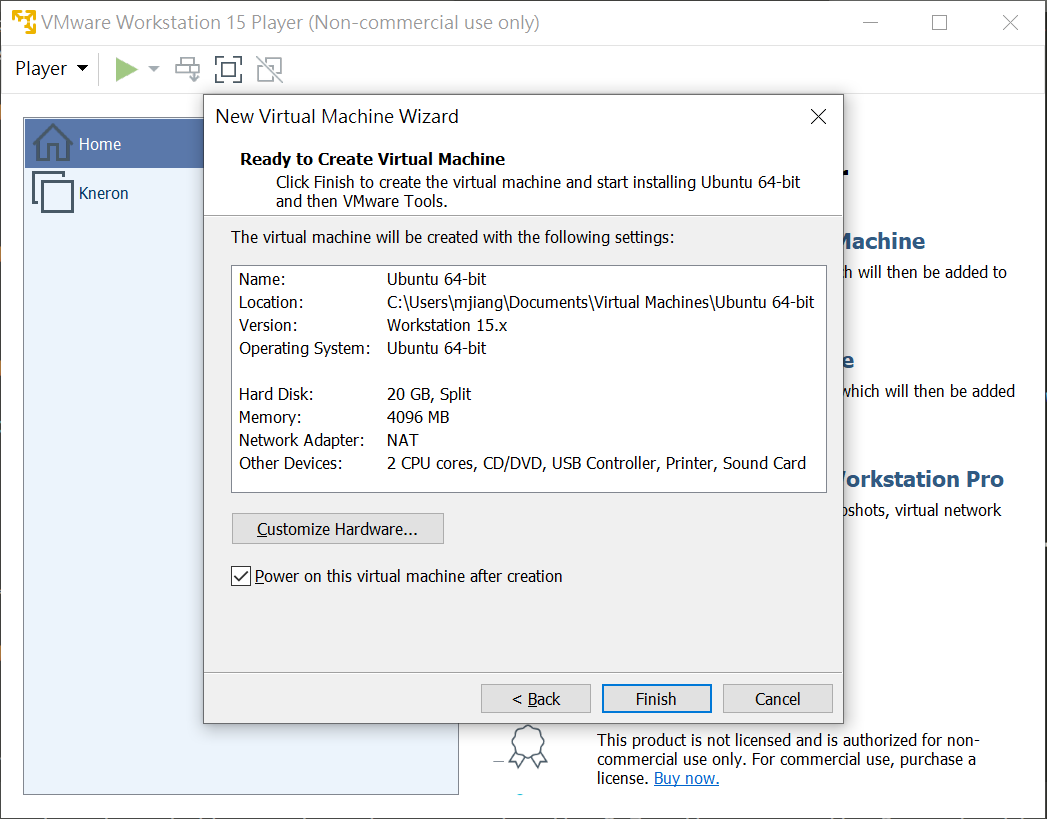
*** 以上 2 個動作在上課前完成 ***
3.3.4 3. 安裝套件之準備工作 (以下步驟 3 - 7 約需時 30 分鐘 )
- 進入 Ubuntu OS 後, 打開 terminal 檔案
- 要記得 Ubuntu 的密碼, 執行 sudo 後需要輸入
$ sudo apt update
$ sudo apt install -y git curl mercurial python2.7 python-pip python3-pip build-essential screen
# Python2 跟 Python3  都會用的到, 用不同的指令來區分 : python 會指向 Python2; python3 會指向 Python3 (不要問我問甚麼會同時用到 2 個不同版本, 不同的開發團隊, 習慣的作法不同)
3.3.5 4. 安裝 ARM mbed-os command line 編譯程式 mbed-cli
$ pip install mbed-cli3.3.5.1 4.1 設定 mbed 目錄路徑(path)
$ sudo find / -name mbed
$ vi ~/.bashrc
# 在 .bashrc 檔案的最後一行 按鍵指令 'a' (append) 加上以下內容, 記得, 不要加上 /mbed
export PATH=$PATH:/path/to/mbed/you/find
# 我自己的例子是 export PATH=$PATH:/home/ubuntu/.local/bin
# 結束後, 按鍵 ':wq!' 來儲存
$ source ~/.bashrc
$ mbed --version     # 測試是否正確執行
3.3.6 5. 安裝 ARM GCC compiler (編譯器)
# 第一步: 在 Ubuntu OS 內, 打開 terminal 並輸入
$ sudo add-apt-repository ppa:team-gcc-arm-embedded/ppa
# 按 'enter' 繼續

# 第一步: 更新 apt
$ sudo apt update

# 第三步: 安裝 gcc-arm toolchain
$ sudo apt install -y gcc-arm-embedded

# 設定 mbed 目錄路徑(path)
$ vi ~/.bashrc
# 在 .bashrc 檔案的最後一行 按鍵指令 'a' (append) 加上以下內容
export GCC_ARM_PATH=/usr/bin/arm-none-eabi-gcc
# 結束後, 按鍵 ':wq!' 來儲存
$ source ~/.bashrc

# 安裝完成, 測試是否正確執行
$ gcc --version

# 第四步: 安裝 Arm Compiler 5 到 64-bit Linux 系統時, 需要安裝 i386 architecture package
$ sudo dpkg --add-architecture i386
$ sudo apt update
$ sudo apt install -y libc6:i386 libncurses5:i386 libstdc++6:i386
3.3.7 6. 下載 TensorFlow Lite for Microcontroller (TFLM)
# clone from tensorflow github
$ git clone -b example --depth 1 https://github.com/marconi1964/tensorflow.git
3.3.8 7. 下載 STM32-F 系列工具箱
- 7.1 更新 STM32-F 板子的 ST-LINK firmware 到最新版 https://my.st.com/content/my_st_com/en/products/development-tools/software-development-tools/stm32-software-development-tools/stm32-programmers/stsw-link007.html ST 網站需要用 email 來註冊才能下載, 選擇版本後, 下載並解壓縮到你設定的目錄下
# 假設你設定解壓縮到 ~/Downloads 目錄下
$ cd ~/Downloads
$ cd stsw-link007/AllPlatforms/StlinkRulesFilesForLinux
$ sudo apt update
$ sudo dpkg -i st-stlink-udev-rules-1.0.2-2-linux-all.deb- 7.2 下載 CoolTerm 程式 https://freeware.the-meiers.org/
- 也可以用步驟 3 已經安裝好的 cli 指令 screen, screen 是比較炫技的方法, CoolTerm 對不熟 Linux 環境的人比較 friendly
3.3.9 8. 開始執行 TensorFlow Lite for Microcontroller 程式
見下一章範例 - Hello_world
3.3.10 參考文件
關於 Make 及 Makefile
> - 取消 TAGS 程式不受影響
> - STM32F 選用 OPTIMIZED_KERNEL_DIR=cmsis_nn 來做最佳化英文參考文章 > - mbed-cli v6.7 installation
> - mbed-cli v5.15 manual installation
> - Build Arm Cortex-M voice assistant with Google TensorFlow Lite
> - CMSIS - Cortex Microcontroller Software Interface Standard
> - STM32F10x Standard Peripherals Library Peripheral’s Drivers Description
> - what means about “-DSTM32F10X_MD -DUSE_STDPERIPH_DRIVER” as the flags of arm-none-eabi-gcc?
3.4 Arduino IDE 安裝 - 方法一: 從 Arduino libraries 安裝 TensorFlowLite
坊間許多的 Arduino 書/網站都有詳細的 Arduino IDE 安裝介紹, 例如 台灣智能感測科技 Arduino IDE 安裝, 就不在此佔用篇幅, Arduino IDE 安裝完成後, 需要在 Arduino IDE 上安裝 Nano 33 BLE 硬體跟 TensorFlow Lite 的範例程式, 簡單說明如下:
- 將 Arduino Nano 33 BLE 加入 Boards 支援: 到 Arduino menu 的 Tools - Board - Boards Manager 輸入 Nano 33 BLE, 找到後選擇最新版本安裝 ‘Install’
- 到 Arduino menu 的 Tools - Manage Libraries, 輸入 TensorFlowLite 後選擇最新版本後安裝 ‘Install’
- 到 Arduino menu 的 File - Examples - Arduino_TensorFlowLite 下會有 4 個範例
- hello_world
- magic_wand
- micro_speech
- person_detection
選擇我們想要的範例 hello_world 執行即可.
偶爾, 在燒錄過程, 或是程式問題, 可能造成筆電無法偵測到 Arduino Nano 33, 找不到 COM port, 這時候, 可以參考 Arduino driver 問題 的 #7, 快速按 2 下 Arduino Nano 33 上面的 RESET 按鈕, 可以讓 Nano 33 回到燒錄模式, 就可以看到 Arduino Nano 33, 找到 COM port.
也許, 程式燒錄後, COM port 位址會變, (像我就遇到燒錄前的 COM 5, 到燒錄後的 COM 6), 這時候, 需要去 Arduino IDE 的 Tool - Port 選取對應到的 COM port.
3.5 Arduino IDE 安裝 - 方法二: 從 Makefile 安裝 TensorFlowLite
參照 TinyML:TensorFlow Lite機器學習 附錄 A 使用及產生 Arduino Library Zip. 採取類似 DISCO_F746NG 使用 Makefile 的作法產生 Arduino IDE 所需要的 library zip 檔案 tensorflow_lite.zip
$ git clone --depth 1 https://github.com/tensorflow/tensorflow.git
$ cd tensorflow
# 執行 test_arduino.sh 來產生 .zip 檔
$ tensorflow/lite/micro/tools/ci_build/test_arduino.sh
# 可以在以下目錄找到 tensorflow_lite.zip
$ ls tensorflow/lite/micro/tools/make/gen/arduino_x86_64_default/prj/tensorflow_lite.zip
記得剛才產生的 tensorflow_lite.zip 的目錄位置, 類似方法一的作法, 但是要修改步驟 2
1. 將 Arduino Nano 33 BLE 加入 Boards 支援: 到 Arduino menu 的 Tools - Board - Boards Manager 輸入 Nano 33 BLE, 找到後選擇最新版本安裝 ‘Install’
2. 到 Arduino menu 的 Tools - Manage Libraries, 輸入 TensorFlowLite 後選擇最新版本後安裝 ‘Install’
2. 到 Arduino menu 的 Sketch - Include Library - Add .ZIP Library, 選取剛才產生的 tensorflow_lite.zip
3. 到 Arduino menu 的 File - Examples - Arduino_TensorFlowLite 下會有 4 個範例
- hello_world
- magic_wand
- micro_speech
- person_detection
選擇我們想要的範例 hello_world 執行即可.
3.6 ESP32-CAM 安裝 Arduino 開發環境
與 Arduino Nano 33 不同的地方, ESP32-CAM 在選擇 Tools - Boards 之前, 需要先到 File - Preserence -AdditionalBoards Manager URLs: 加入 “https://dl.espressif.com/dl/package_esp32_index.json” 後, 再到 Tools - Boards 去選擇 ESP32-CAM.
3.7 ESP32-CAM 安裝 esp-idf 開發環境
3.7.1 ESP32-CAM 硬體簡介
ESP32-CAM 可以使用 Arduino IDE, 也可以使用 ESP32 官方的開發環境 esp-idf. 以下介紹 esp-idf 開發環境的設定:
本文使用的 ESP32-CAM 使用了 2 個硬體版本,
* 需要外接 USB-serial 轉板 : 燒錄 ESP32-CAM 程式式, 需要將 GPIO 0 接到 GND, 詳見 ESP32-CAM Randomnerd-tutorials
* 自帶 CH340 的 ESP32-CAM : 這種整合型的硬體穩定性較佳. 燒錄時, 切換下載模式步驟 : 按住Flash, 再按RST, 放開RST, 放開Flash
這 2 個硬體版本的軟體設定都是選擇 AI thinker ESP32-CAM (不管是用 Arduino IDE 或是 esp-idf)
3.7.2 esp-idf 安裝環境設定
基本上, 照著 Espressif ESP-IDF Programming Guide 上的詳細說明, 大致上不會遇到問題. 我用的是 command line 的 tool chain,
- Toolchain to compile code for ESP32
- Build tools - CMake and Ninja to build a full Application for ESP32
- ESP-IDF that essentially contains API (software libraries and source code) for ESP32 and scripts to operate the Toolchain
而不是 Eclipse 或 VS Code 的 IDE
- Eclipse Plugin (installation link)
- VS Code Extension (onboarding)
照著網頁上的 10 個步驟逐步完成, 算是簡單
- Step 1. Install prerequisites for Windows, Linux, or macOS
- Step 2. Get ESP-IDF
- Step 3. Set up the tools
- Step 4. Set up the environment variables
可以先執行範例程式, 確定沒有問題後, 再進行 TensorFlow Lite Micro 的範例, 才不會糾結在從何處 debug 著手的問題
- Step 5. Start a Project
- Step 6. Connect Your Device
- Step 7. Configure (注意 1)
- Step 8. Build the Project
- Step 9. Flash onto the Device
- Step 10. Monitor (注意 2, 3, 4)
注意 1 : Step 7 的 config 無須特別設定, 看看後就可以 (Q)uit
我曾經卡在 step 9, VMware 下的 Ubuntu 18.04 讓我無法連接上 USB Serial port, 看得到, 但讀寫有問題,Google 了好幾回, 能找到的 Stackoverflow 最佳解 還是無法解決已經將 user 設定成 dialout 群組卻還無法讀寫 USB serial port 的問題, 只能用暴力的 chmod 作法.
$ ls -l /dev/ttyUSB*
crw-rw---- 1 root dialout 188,0 Apr  5 16:41 /dev/ttyUSB0

$ sudo chmod 666 /dev/ttyUSB0
$ ls -l /dev/ttyUSB*
crw-rw-rw- 1 root dialout 188,0 Apr  5 16:41 /dev/ttyUSB0
注意 2 : Step 10 的 monitor 可以跟 step 9 的指令結合如下:
$ idf.py -p PORT flash monitor # 這裡的 PORT 用 /dev/ttyUSB0 取代注意 3 : 記得, 燒錄完成後, 雖然軟體會自動下個 soft reset, 可是 ESP32-CAM 都沒有動作, 還是需要按板子上的 RST 鍵才能執行新下載的程式.
注意 4 : 執行 monitor 程式時, 如果要離開, 需要按 ‘Ctrl’ + ‘]’ 的組合鍵.